These Gluten-Free Dinner Rolls are the perfect side for cozy family dinners, holiday feasts, and special gatherings where you want everyone to enjoy warm, homemade bread. Their soft, fluffy texture and lightly sweet, buttery flavor make them especially suited for occasions like Thanksgiving, Christmas, Sunday roasts, or any celebratory meal that calls for a basket of fresh rolls on the table

For these soft and fluffy gluten-free dinner rolls, you will need:
- All-purpose gluten-free flour with xanthan gum
- Salt
- Rapid rise/instant yeast
- Warm milk
- Unsalted butter, softened
- Eggs, room temperature
- 1 tsp apple cider vinegar
- ½ cup honey
- Unsalted butter, melted (for brushing after baking)
A gluten-free all-purpose flour blend that already includes xanthan gum works best here. The xanthan gum helps mimic the structure that gluten would normally provide and gives the rolls their soft, elastic texture. The warm milk activates the yeast, while eggs and butter add richness and tenderness. Honey not only sweetens the rolls lightly but also helps keep them moist and enhances browning.
How to make gluten-free dinner rolls step by step
Prep the pans
Spray two 9-inch round cake or pie pans with gluten-free cooking spray. Metal pans tend to brown more evenly, but glass also works if that is what you have.
Combine dry ingredients
In a large mixing bowl, add 3 cups of gluten-free all-purpose flour and the salt. Make a small well in the flour with your finger and sprinkle the instant yeast into that well. This helps distribute the yeast evenly once the warm milk is added.
Warm the milk
Warm the milk to 110–115°F (43–46°C)
(43–46°C). A microwave-safe glass measuring cup works well. Microwave for about 1 minute and 30 seconds, then check the temperature with a thermometer. If the milk is too hot, let it cool slightly; milk that is too hot can kill the yeast and prevent the rolls from rising.
Activate and mix
Pour the warm milk over the yeast mixture in the flour. Add the softened butter, eggs, apple cider vinegar, and honey to the bowl. Using the dough hook or paddle attachment of a stand mixer, mix on medium speed for 2–3 minutes. Scrape down the sides as needed to incorporate all of the flour.
The dough will be sticky and more like a thick batter than traditional wheat bread dough. If it looks overly loose, add up to an additional ½ cup of gluten-free flour, a spoonful at a time, until it holds its shape but is still soft and sticky.
Portion the dough
Spray an ice cream scoop or large cookie scoop with gluten-free cooking spray to prevent sticking. Scoop portions of dough and place them into the prepared pans. Arrange 8 dough balls around the outer edge of each pan and 1 in the center. This recipe makes 18 rolls total, so one pan will hold 9 rolls and the second pan will hold the remaining 9.
Smooth the tops
Use a small spatula, lightly greased if needed, to smooth the tops of the dough balls. This helps the rolls bake up with a more uniform, rounded top.
Let the rolls rise
Cover each pan with a clean kitchen towel. Place the pans in a warm, draft-free spot and allow the rolls to rise for about 1 hour. The rolls should puff up noticeably and start to fill the pan.
Preheat the oven
Near the end of the rise time, preheat the oven to 400°F (204°C) (204°C). Position an oven rack in the middle of the oven for even baking.
Bake
Bake the rolls for 14–16 minutes, or until the tops are a light golden brown. Because ovens vary, start checking around the 14-minute mark. An instant-read thermometer inserted into the center of a roll should read about 200°F (93°C) (93°C) when done.
Finish with melted butter
Remove the pans from the oven and immediately brush the tops of the warm rolls with the melted butter. This adds flavor, keeps the crust soft, and gives the rolls a beautiful sheen. Serve warm and enjoy.

Gluten-free baking tips
Gluten-free yeast dough behaves differently from traditional wheat dough, but with a few simple strategies, you can achieve consistently soft, fluffy rolls.
Use the right flour blend.
Choose a high-quality all-purpose gluten-free flour that already contains xanthan gum. If your blend does not include xanthan gum, add about 1 tsp per cup of flour. Avoid single flours like only rice or only almond flour for this recipe.
Expect a sticky dough.
Gluten-free dinner roll dough will be closer to a sticky batter than a kneadable bread dough. Resist the urge to add too much extra flour, or the rolls will turn out dense and dry.
Mind the liquid temperature.
Yeast needs warmth to activate, but milk hotter than about 115°F (46°C) (46°C) can kill it. Use a thermometer for accuracy. If the rolls do not rise during the proofing stage, overly hot milk or expired yeast are common culprits.
Create a warm rising environment.
Gluten-free dough often benefits from a slightly warmer proofing environment. A turned-off oven with the light on, or a warm corner of the kitchen, helps the dough rise more reliably and quickly.
Avoid overbaking.
Because gluten-free breads can dry out faster, keep a close eye on the rolls near the end of the baking time. Light golden brown and an internal temperature of about 200°F (93°C) 93°C) are ideal.
Serve fresh or rewarm gently.
Like most gluten-free baked goods, these dinner rolls are at their very best the day they are baked. If serving later, rewarming them helps restore their soft texture.

Serving suggestions
Gluten-free dinner rolls are incredibly versatile and can complement almost any meal:
- Serve warm with butter and a drizzle of honey or jam for a simple side.
- Pair them with soups, stews, or chilis for a comforting, cold-weather dinner.
- Add them to your holiday table alongside turkey, ham, or roast beef.
- Use leftover rolls for mini sandwiches or sliders the next day.
- Split and toast them for a quick gluten-free breakfast roll.
Storage instructions
Because gluten-free breads do not stay soft as long as traditional wheat breads, proper storage is important.
Room temperature:
Store cooled gluten-free dinner rolls in an airtight container or zip-top bag at room temperature for 1–2 days. Add a small piece of parchment to absorb excess moisture if needed.
Reheating:
To refresh day-old rolls, wrap them in foil and warm in a 300°F (150°C) (150°C) oven for 8–10 minutes, or microwave one roll at a time for about 10–15 seconds until just warm.
Freezing:
For longer storage, freeze the rolls. Once completely cool, place them in a freezer-safe bag or container, removing as much air as possible. Freeze for up to 2–3 months. Thaw at room temperature, then rewarm in the oven or microwave before serving.
More gluten-free recipes to make ASAP!
- Gluten-Free Gingerbread Crinkle Cookies
- Gluten Free Crescent Rolls
- Gluten-Free Pumpkin Roll
- Gluten-Free Pumpkin Pie Cookies
You can also FOLLOW ME on Facebook and Pinterest to see more of the delicious food I’m making!
Soft, Fluffy & Easy Gluten-Free Dinner Rolls
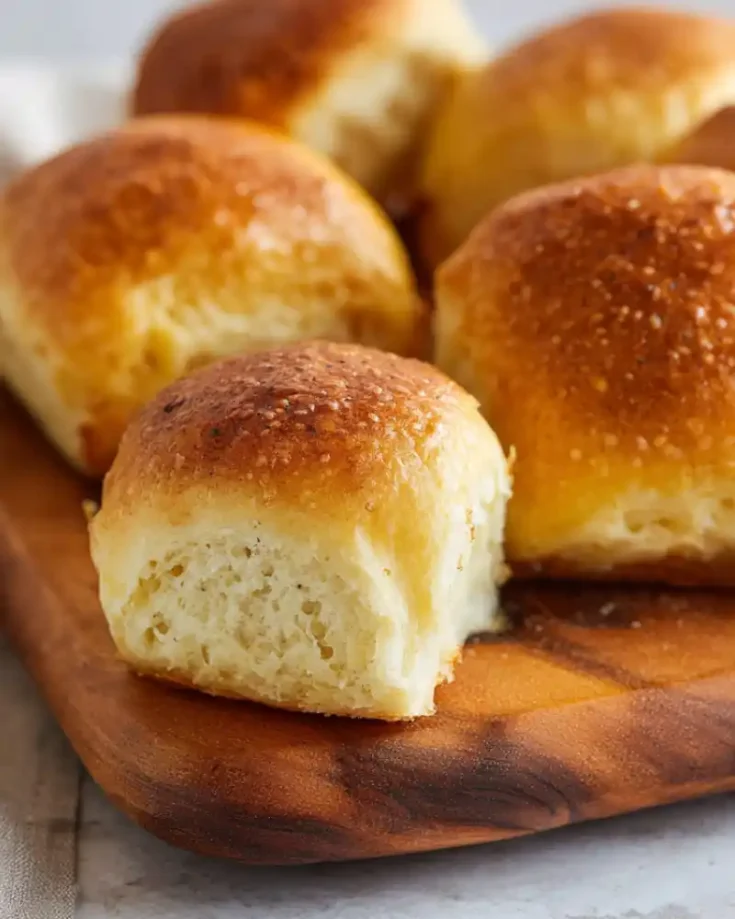
Gluten-Free Dinner Rolls that are soft, fluffy, and slightly sweet, perfect for Sunday dinners, Thanksgiving, and Christmas.
Ingredients
- 3–3½ cups all-purpose gluten-free flour with xanthan gum
- 1 tsp salt
- 1¾ tsp rapid rise/instant yeast
- 1¼ cups warm milk, 110–115°F (43–46°C) (43–46°C)
- ¼ cup unsalted butter, softened
- 2 eggs, room temperature
- 1 tsp apple cider vinegar
- ½ cup honey
- 2 tbsp unsalted butter, melted (for brushing after baking)
Instructions
- Prep the pans Spray two 9-inch round cake or pie pans with gluten-free cooking spray. Metal pans tend to brown more evenly, but glass also works if that is what you have.
- Combine dry ingredients In a large mixing bowl, add 3 cups of gluten-free all-purpose flour and the salt. Make a small well in the flour with your finger and sprinkle the instant yeast into that well. This helps distribute the yeast evenly once the warm milk is added.
- Warm the milk Warm the milk to 110–115°F (43–46°C) (43–46°C). A microwave-safe glass measuring cup works well: microwave for about 1 minute 30 seconds, then check with a thermometer. If the milk is too hot, let it cool slightly—milk that is too hot can kill the yeast and prevent the rolls from rising.
- Activate and mix Pour the warm milk over the yeast in the flour mixture. Add the softened butter, eggs, apple cider vinegar, and honey to the bowl. Using the dough hook or paddle attachment of a stand mixer, mix on medium speed for 2–3 minutes. Scrape down the sides as needed to incorporate all of the flour.
- The dough will be sticky and more like a thick batter than traditional wheat bread dough. If it looks overly loose, add up to an additional ½ cup of gluten-free flour, a spoonful at a time, until it holds its shape but is still soft and sticky.
- Portion the dough Spray an ice cream scoop or large cookie scoop with gluten-free cooking spray to prevent sticking. Scoop portions of dough and place them into the prepared pans. Arrange 8 dough balls around the outer edge of each pan and 1 in the center. This recipe makes 18 rolls total, so one pan will hold 9 rolls and the second pan will hold the remaining 9.
- Smooth the tops Use a small spatula, lightly greased if needed, to smooth the tops of the dough balls. This helps the rolls bake up with a more uniform, rounded top.
- Let the rolls rise Cover each pan with a clean kitchen towel. Place the pans in a warm, draft-free spot and allow the rolls to rise for about 1 hour. The rolls should puff up noticeably and start to fill the pan.
- Preheat the oven Near the end of the rise time, preheat the oven to 400°F (204°C) (204°C). Position an oven rack in the middle of the oven for even baking.
- Bake Bake the rolls for 14–16 minutes, or until the tops are a light golden brown. Because ovens vary, start checking around the 14-minute mark. An instant-read thermometer inserted into the center of a roll should read about 200°F (93°C) (93°C) when done.
- Finish with melted butter Remove the pans from the oven and immediately brush the tops of the warm rolls with the melted butter. This adds flavor, keeps the crust soft, and gives the rolls a beautiful sheen. Serve warm and enjoy.
Nutrition Information:
Yield:
18Serving Size:
1Amount Per Serving:Calories: 76Total Fat: 5gSaturated Fat: 3gUnsaturated Fat: 2gCholesterol: 33mgSodium: 171mgCarbohydrates: 7gFiber: 0gSugar: 6gProtein: 2g
Don’t forget to PIN IT for later!


Which brand and type of flour do you use? I have bobs Redmill 1:1 baking flour with xanthum gum. Or bobs Redmill all purpose flour (more for breads etc without xanthum gum) but can add the xanthum gum
What is the GF flour used in this recipe?
In Australia i use well and good flour.
Hope this helps
I made them for the first time and over an hour later and they still haven’t risen. Ideas?
Room not warm, old yeast, or milk too hot that killed the yeast.
Yum
Thanks forcsharing
can you make these dairy free and egg free? im having a hard time finding a gluten free bread recipe that actually works with plant based milk and egg replacers?