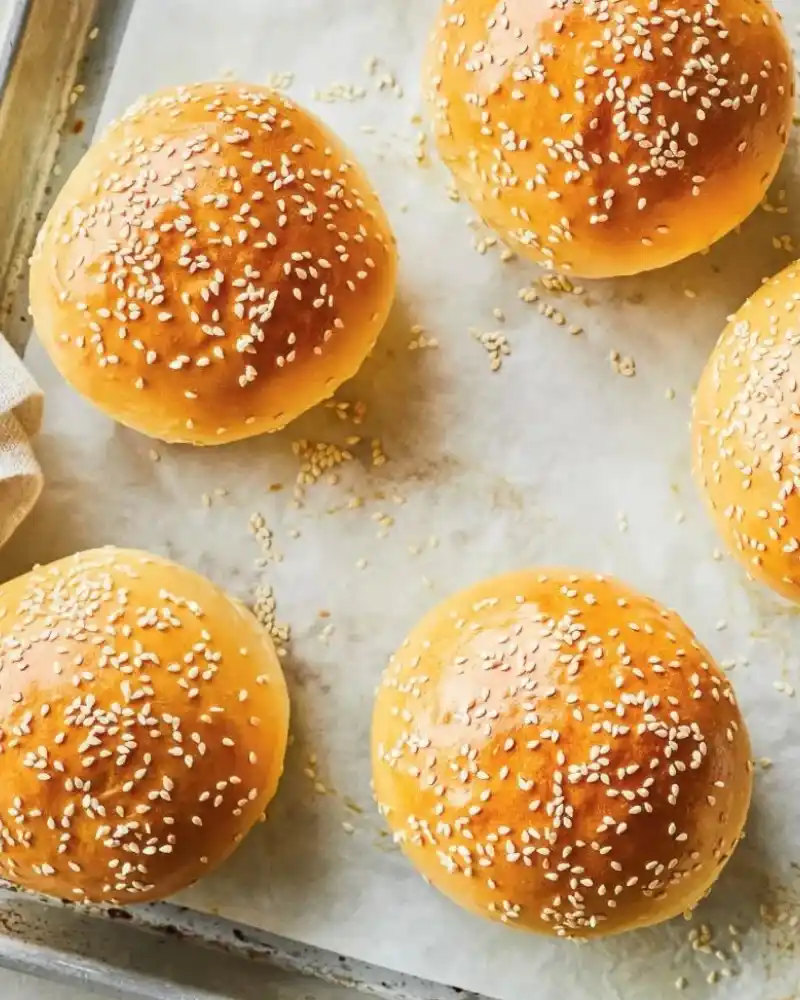
These Gluten-Free Hamburger Buns are easier to make than you might think, and they taste so much better than anything from the store. This soft, squishy gluten-free bun recipe holds together, toasts beautifully, and turns every backyard burger night into something special.

Gluten Free Hamburger Buns changed the way Burger Night looks in my kitchen. For years, I ate my burger with a knife and fork or on a sad lettuce wrap while everyone else piled their burgers onto fluffy buns.
One weekend, I decided that was over. I cleared the counter, pulled out all my gluten-free flours, and promised myself I would not quit until I had a bun that was soft enough to squish but sturdy enough to hold a messy, juicy cheeseburger. The dough felt almost too sticky, and I almost panicked, but once those buns puffed in the oven and came out golden, the whole kitchen smelled like a real bakery.
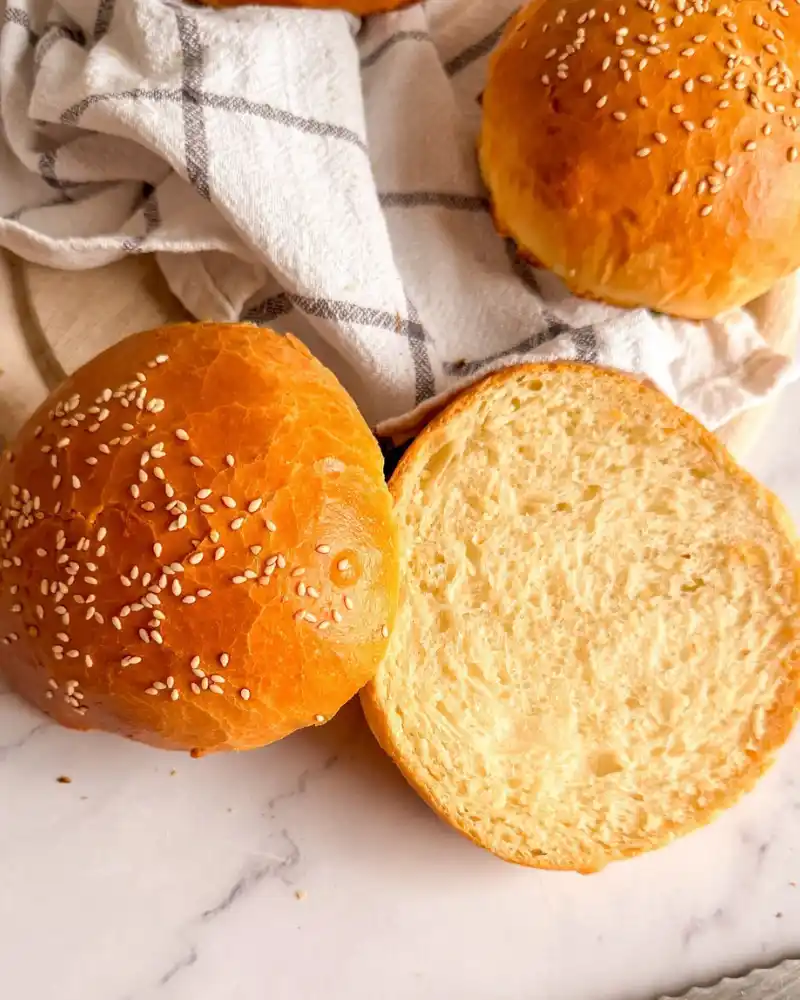
When I sliced into the first bun, steam escaped and the crumb looked tender instead of gummy. I stacked my burger, took one bite, and honestly forgot it was gluten-free. Now, whenever friends come over, nobody asks where the “regular” buns are; they just ask for the recipe.
Notes on ingredients for Gluten-Free Hamburger Buns:
Warm milk or plant-based liquid: Warming the milk to 105–115°F wakes up the yeast so it can create lift and a tender crumb; you can use plant milk or water, but milk adds richer flavor and browning.
Active dry yeast + sugar: Yeast provides rise, while a bit of sugar feeds the yeast and also helps the buns brown deeply in the oven. Using part of the sugar in the yeast mixture helps you quickly confirm that the yeast is active.
Brown rice flour: Brown rice flour acts as the main whole-grain base, bringing a mild, neutral flavor and helping the buns feel sturdy rather than gummy when paired with starches.
Tapioca flour and potato starch: Tapioca starch adds chew, elasticity, and that pillowy interior that mimics traditional wheat buns, while potato starch boosts lightness and softness. Together, they keep the crumb tender instead of dense or crumbly.
Sorghum flour or gluten-free oat flour: Sorghum flour (or oat flour) brings whole-grain flavor, gentle sweetness, and extra protein and fiber, which all support a soft, bready texture and better nutrition in gluten-free baking. Either option works without sacrificing structure.
Sweet rice flour (Mochiko): Sweet rice flour behaves like a sticky binder, helping the dough hold together and slice cleanly once baked and cooled. It differs from regular rice flour and adds a slightly chewy, bakery-style crumb.
Xanthan gum, baking powder, and cream of tartar: Xanthan gum replaces gluten’s elasticity and keeps the buns from crumbling, while baking powder and cream of tartar add extra lift and fine, even bubbles alongside the yeast. This trio is key for tall, fluffy gluten-free buns.
Eggs, egg whites, butter, and vinegar: Whole eggs and egg whites strengthen the structure and help the tops brown, while melted butter adds richness and a soft mouthfeel. Apple cider vinegar reacts with the leaveners and subtly brightens the flavor.
Egg wash, sesame seeds, and finishing butter: The egg wash gives the buns shine and helps the sesame seeds stick, while a final brush of melted butter softens the crust and adds that classic bakery-style finish.
Scroll down to the recipe card to find the ingredient quantities and recipe instructions.
How to Make Gluten-Free Hamburger Buns
Prep and activate the yeast
Start by lining two light-colored baking sheets with parchment paper and, if your oven has one, turning on the proof setting so you have a warm place for the buns to rise. In a medium bowl, whisk together the warm milk (105–115°F), 1 tablespoon of the sugar, and the active dry yeast, then let it sit for 5–10 minutes until the mixture looks foamy and bubbly on top.
If the yeast mixture does not foam after 10 minutes, discard it and start again with fresh yeast, since inactive yeast will give you dense, flat buns. While the yeast proofs, gather and measure all remaining ingredients so they are ready to add as soon as the yeast is activated.
Mix the dry ingredients
In the bowl of a stand mixer fitted with the paddle attachment, combine the remaining 3 tablespoons sugar, brown rice flour, tapioca flour, potato starch, sorghum flour or oat flour, sweet rice flour, xanthan gum, kosher salt, baking powder, and cream of tartar. Mix briefly on low speed (or whisk by hand) just until everything looks evenly blended and no streaks of individual flours remain.
Using several flours gives structure, chew, and softness without gluten, so it is important not to swap or skip ingredients unless you are comfortable adjusting hydration and texture. Keeping the dry ingredients evenly mixed helps the dough hydrate consistently, which leads to a more even crumb in the finished buns.
Make the dough
Pour the foamy yeast mixture into the stand mixer bowl with the dry ingredients, then add the whole eggs, egg whites, melted butter, and apple cider vinegar. Start mixing on low speed until everything is combined, then increase to medium-high and beat for about 4 minutes, scraping down the sides as needed.
The dough should look thick, very soft, and sticky, closer to a stiff batter than a kneadable bread dough, which is normal for gluten-free yeast dough. Avoid adding extra flour at this stage, because a wetter dough bakes into softer buns; too much flour will make them dry and dense.
Shape the buns
Set a small bowl of tapioca starch near your work area, and dust your work surface generously with it. Lightly flour your hands with tapioca starch as well, since the dough will be too sticky to handle otherwise.
Use a ⅓-cup measuring cup to scoop portions of dough, aiming for about 105–115 g each so the buns bake evenly and are similarly sized for burgers. Drop each portion onto a tapioca-dusted plate, dust the outside with more tapioca starch, then gently flatten, fold the edges toward the center, and pinch them together before flipping the portion seam-side down and cupping your hands around it to form a smooth ball.
Proof the dough
Arrange the shaped buns seam-side down on the parchment-lined baking sheets, spacing them so they have room to expand without touching too much. Lightly mist the tops with cooking spray, then cover loosely with plastic wrap to prevent the surface from drying out as they rise.
Place the trays in a warm spot or the proofing oven and let the buns rise for about 30 minutes, or until noticeably puffy and lighter. If preparing the dough ahead, you can proof for about 10 minutes, refrigerate up to 24 hours, then bring it back to room temperature and proof for about 25 minutes before baking.
Brush, top, and bake
Near the end of the proofing time, preheat the oven to 375°F so it is fully heated when the buns are ready to bake. In a small bowl, whisk together 1 egg and 1 tablespoon of water to make an egg wash, then gently brush the tops and sides of each bun.
Sprinkle the buns generously with raw sesame seeds so they stick to the egg wash and bake into a golden, flavorful crust. Bake the buns for about 16–18 minutes, rotating the pans once halfway through, until they are deeply golden brown on top and feel set rather than squishy when lightly tapped.
Finish, cool, and serve
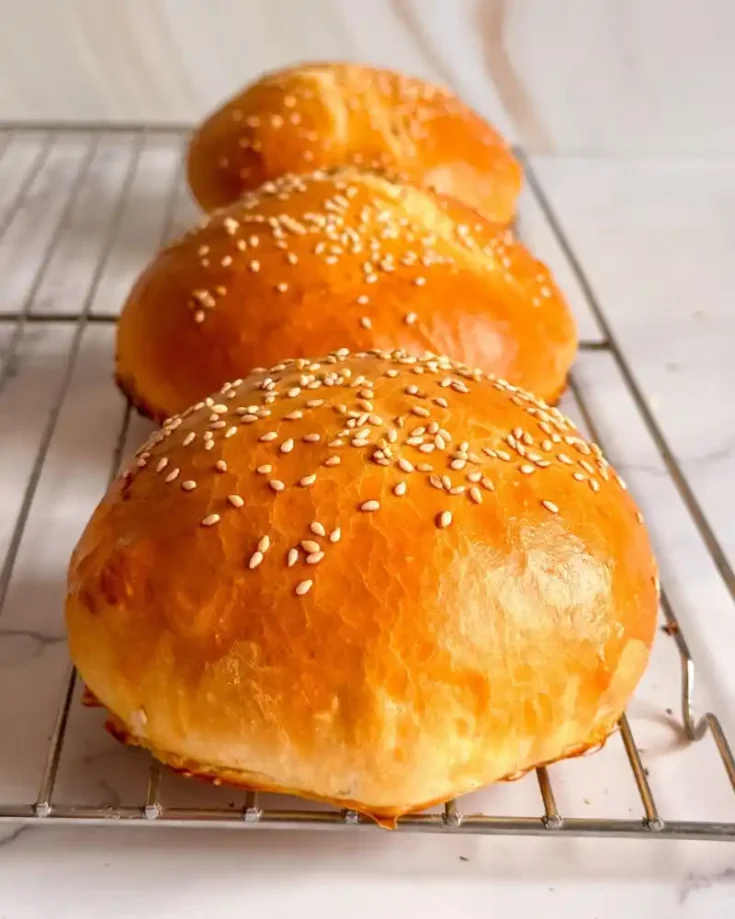
As soon as the buns come out of the oven, brush the tops with melted butter (or plant butter) to soften the crust and add a rich, bakery-style finish. Leave the buns on the baking sheets or transfer them to a cooling rack and let them cool for about 15 minutes, which allows the crumb to set fully so the interior does not seem gummy when sliced.
Serve the buns slightly warm for the softest, squishiest texture, or cool completely and store them airtight; lightly reheating or toasting restores their fresh-baked softness even after storage. For the best burger stacking, slice them horizontally just before serving so the crumb stays moist and tender.
What are the best gluten-free hamburger buns?
The best gluten-free hamburger buns balance structure and softness, hold up to juicy burgers, and stay tender without crumbling. Recipes that blend whole-grain flours (like brown rice and sorghum) with starches (like tapioca and potato) and xanthan gum tend to mimic the chew and elasticity of wheat buns most closely.
Many home bakers love soft, brioche-style gluten-free buns enriched with eggs and butter for their rich flavor, pillowy crumb, and golden crust. Store-bought options from brands focused on gluten-free baking can also work well, but fresh, homemade buns usually win on taste and texture, especially when lightly toasted before serving.
Storage:
Keep buns in an airtight container at room temperature for 1–2 days, then always rewarm or lightly toast before serving to bring back softness.
For longer storage, slice, wrap well, and freeze up to about 2–3 months; thaw at room temperature and warm or toast so they do not feel dry or crumbly.
Looking for more gluten-free recipes? Be sure to check these recipes out:
- Gluten-Free Chocolate Butter Cookies
- Gluten-Free Focaccia Bread
- Gluten-Free Pecan Bars
- Gluten-Free Apple Crisp
- Soft, Fluffy & Easy Gluten-Free Dinner Rolls
You can also FOLLOW ME on Facebook and Pinterest to see more of the delicious food I’m making!
Soft Gluten-Free Hamburger Buns
Bake soft, fluffy Gluten-Free Hamburger Buns at home in under an hour. These bakery-style buns are sturdy, squishy, and perfect for juicy burgers every time.
Ingredients
- 1 cup whole milk, warmed to 105–115°F (240 g) Or 240 g plant milk or 225 g water
- 1 tablespoon + 2 teaspoons active dry yeast
- ¼ cup granulated sugar, divided
- ¾ cup + 2 tablespoons (140 g) Bob's Red Mill brown rice flour
- 1 cup + 1 tablespoon (119 g) Bob's Red Mill tapioca flour, plus more for rolling
- 80 g (½ cup + 2 tablespoons) of Bob's Red Mill sorghum flour or Bob's Red Mill Gluten-Free Oat Flour
- 78 g (½ cup) of Bob's Red Mill potato starch
- ¼ cup + 2 tablespoons (60 g) sweet rice flour (Mochiko – not the same as regular rice flour)
- 1½ teaspoons xanthan gum
- 1½ teaspoons kosher salt
- ½ teaspoon baking powder
- ¼ teaspoon cream of tartar
- 2 large eggs, room temperature
- 2 large egg whites, room temperature
- 84 g (6 tablespoons) unsalted butter, melted (or plant butter)
- 1 tablespoon apple cider vinegar
- Cooking spray
Egg wash & topping
- 1 large egg, room temperature
- 1 tablespoon water
- 2 tablespoons raw sesame seeds
- 2 tablespoons unsalted butter, melted (or plant butter)
Instructions
- Prep the pans: Line two light-colored baking sheets with parchment paper. If your oven has a proof setting, turn it on now.
- Activate the yeast: In a medium bowl, whisk together the warm milk (105–115°F), 1 tablespoon of the sugar, and the yeast.
- Let sit 5–10 minutes, until the mixture is foamy. If it does not foam, discard and start again with fresh yeast.
- Mix the dry ingredients: In the bowl of a stand mixer fitted with the paddle attachment, combine the remaining 3 tablespoons sugar, brown rice flour, tapioca flour, potato starch, sorghum or oat flour, sweet rice flour and xanthan gum, salt, baking powder, and cream of tartar. Mix briefly to evenly distribute the ingredients.
- Make the dough: Pour the yeast mixture into the dry ingredients. Add the eggs, egg whites, melted butter, and apple cider vinegar. Mix on low until combined, then increase to medium–high and beat for about 4 minutes, scraping down the bowl as needed. The dough will be very soft and sticky, more like a thick batter than a typical bread dough.
- Shape the buns: Set a small bowl of tapioca starch near your work surface and dust the surface generously. Lightly dust your hands with tapioca starch. Using a ⅓ cup measure, portion about 105–115 g of dough per bun onto a tapioca-dusted plate. Dust the outside of each portion with tapioca starch, then gently flatten it. Fold and pinch the edges into the center, flip seam-side down, and use cupped hands to shape into a smooth ball. Add more tapioca starch to your hands as needed. Place the buns seam-side down on the prepared baking sheets, spacing them apart. If the dough starts sticking, wash and re-flour your hands.
- Proof the buns: Lightly spray the buns with cooking spray and cover loosely with plastic wrap. Proof in a warm place for about 30 minutes, until noticeably puffy. For an overnight option, proof for 10 minutes, refrigerate up to 24 hours, then bring to room temperature and proof about 25 minutes before baking. When the buns are nearly proofed, preheat the oven to 375°F.
- Brush with egg wash and top: Whisk together the egg and 1 tablespoon water in a small bowl. Gently brush the tops and sides of each bun with egg wash. Sprinkle generously with raw sesame seeds.
- Bake: Bake at 375°F for 16–18 minutes, rotating the pans halfway through, until the buns are deeply golden brown and feel set on top.
- Finish with butter: Immediately after baking, brush the hot buns with melted butter (or plant butter) to soften the crust and add flavor.
- Cool and serve :Let the buns cool until just cool to the touch on the outside, about 15 minutes, before slicing. Serve slightly warm. As they cool, they will become denser, but a quick warm-up or light toasting brings back the soft, squishy texture.
Recommended Products
As an Amazon Associate, I earn from qualifying purchases.
-
 Bob's Red Mill Gluten Free Active Dry Yeast, 08 Oz
 -
Wholesome Sweeteners 10-Pound Organic Cane Sugar, Fair Trade, Non GMO, Gluten Free, Pure & Vegan, for Baking and Sweetening
-
Bob's Red Mill Brown Rice Flour, 24oz (Pack of 1) - Non GMO, Whole Grain, Vegan, Kosher
-
Bob's Red Mill Gluten Free Oat Flour, 18 oz (Pack of 1) - Gluten Free, Whole Grain, Vegan, Kosher
-
Bob's Red Mill Potato Starch, 22oz (Pack of 4) - Non GMO, Vegan, Kosher
-
Koda Farms Mochiko Sweet Rice Flour, 16-Ounce (Pack of 9)
-
Bob's Red Mill Xanthan Gum, 8oz (Pack of 1) - Vegan, Keto Friendly, Kosher
-
Bob's Red Mill Baking Powder, 14oz (Pack of 1) - Gluten Free, Vegan, Kosher


Don’t forget to PIN IT for later!